Start here: Choose the guide for your role. Presenters prepare questions, assign work and review responses; Participants complete assigned work and join live classes. Button names below match the current test portal and may vary slightly by account permissions.
1. Choose your role
Presenter
Create questions and assignments, select participants, track submissions, provide feedback, organise groups and run live sessions.
Participant
Check progress, complete assigned coursework, practise from the available library and join live sessions.
The role belongs to the account. Sign in with the account provided for your role.
2. Login and account signup
Log in
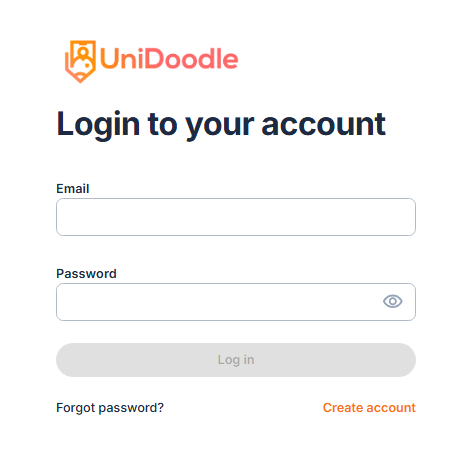
- Open the UniDoodle sign-in page.
- Enter your email and password, then choose Log in.
- On first sign-in, follow or skip the guided tour. Use the sidebar to navigate.
For a forgotten password, use Forgot password? on the login screen and follow the reset email.
Create a new account
The login page's Create account link opens UniDoodle Pricing. Pick the right role and plan.
- Participant: select Students, choose a plan's Start Free Trial, and enter first name, last name, email, password and confirmation.
- Presenter: select Presenters, choose Register as a Presenter for a plan, and enter the same details.
Select Get started to submit the registration. The form says this accepts the Terms & Conditions and Privacy Policy, so review them first. Pricing and trial terms may change; check the current pricing page before choosing.
3. Presenter (Teacher) guide
The sidebar includes Create Assignment, Create Live Session, My Assignments, My Question Bank, My Groups and My Live Session.
3.1 Build your question bank
- Open My Question Bank and select Add Questions.
- Add tags; press Enter or type a comma to commit a tag.
- Set visibility: Private (Only Me), Share with Organisation or Share with Specific Presenters.
- Choose a capture mode. Document lets you upload a PDF or image, then select question/marking regions in the viewer. Manual is the alternative capture mode.
- Set the question number and whether it is a Main Question or Question Part. Confirm the snip, continue to review, then check the question before saving.
The bank has My Questions and Drafts views. Saved questions can be used when preparing assignments and live sessions.
3.2 Create and assign an assignment
Use the two-column form: assignment details and recipients are on the left; question selection is on the right. The page shows live counts for selected participants and questions. The Send to Students button stays unavailable until the required details, recipients and questions are in place.
1. Set the assignment details
- In Assignment Name, enter a short title students will recognise. This field is required.
- Add an optional Description with instructions, materials to bring or other context students need before they start.
- Set the Due Date. The form starts with a suggested date; check it and choose today or a future date. A date in the past prevents sending.
- Optionally choose an Estimated Time of 10, 15, 20, 30, 45, 60 or 90 minutes. Choose None if you do not want to show an estimate; this is guidance for students, not a countdown timer.
- Under When Students See Their Results, choose one release style: Immediately After Each Question shows the score and reasoning after each answer; After Submitting the Entire Assignment holds scores until the student submits all work; After Teacher Review keeps results hidden until you review and release them.
2. Choose the recipients
- Use the search box to find a student by name or email, then select them. The participant list below also lets you toggle people individually.
- Search for a group and choose it to add all its members. Group selection adds those participants to the current selection; it does not remove people already selected.
- Use Select All to include every listed student. It changes to Deselect All when everyone is selected. Check the selected-student count before sending.
3. Choose questions
- Switch between Organisation Question Bank and My Question Bank. Pick the bank that contains the questions you need; questions you have not saved to a bank will not appear here.
- In the organisation bank, filter by subject, exam, year, level or paper. In your own bank, filter by tags or keywords. Filters narrow the visible cards.
- Select a question card to add or remove it. Use the matching Select All control to select all questions currently shown by the active filters; it does not necessarily select hidden questions.
- Use a question thumbnail to preview the question before assigning it. The selected-question count updates as you make changes.
- A personal question marked No marking scheme cannot be added until a marking scheme is provided in My Question Bank. It remains previewable.
Final check: Confirm the title, due date, estimated time, result-release choice, recipients and selected questions. Then choose Send to Students. The success window confirms the assignment was sent and offers Create Another or Back to My Assignments.
3.3 Track, review and give feedback
Open My Assignments to see the assignment overview and its active, completed and expired counts. Use the status filter, search box and sort menu to find an assignment. The table shows participant completion, average marks, best and worst scores, status and grade mode. Open an assignment to inspect submissions and progress. Review each answer, award marks, add feedback and release results when the assignment's grade mode requires teacher review. A participant may show no score until they submit or you release the reviewed result.
3.4 Group Participants
Open My Groups to view and search participants or create a group where permitted. Organisation-managed groups may have disabled membership controls; ask the organisation administrator to change those. You can select participants directly from the assignment form without using a group.
3.5 Create a live session
Set up and schedule
- Choose Create Live Session in the sidebar, enter a clear title and choose a duration. The default is 45 minutes; options include 15, 30, 45, 60 and 90 minutes.
- Optionally prepare questions from the Question Bank: filter by tags, preview results and select questions. You can also prepare questions in the room. Choose students or groups for direct invitations if needed; participants can join with the code or QR without an email invitation.
- Choose Start now to open the room, or Save for later to schedule it. For a scheduled session, select a date and time and optionally send invitations. Scheduled sessions appear on this page, where you can start, reschedule, remind or cancel them. Select a row to inspect or edit the title, duration, schedule and question queue.
Invite participants and open the room
- In the room header, share the six-character code or expand the panel to show the QR invitation. The access pass also has a copy-code button.
- Participants sign in, open My Live Session, and enter the code, or scan the QR code.
- The header shows connection status, participant count, elapsed time and the session controls. Edit the session title from the header.

3.6 Run the live session
Create and queue questions
- In Send Questions, switch between Create question and Question Bank. For a new question, enter the prompt, set marks, and optionally upload an image. Choose a response format and set the question timer.
- Prepare the question details using the selected response format. For multiple choice, add or remove options and mark every correct option. For written answer, set the expected answer. Include any image and response instructions participants need.
- In Question Bank, filter saved items by tags, preview them and add selected questions to the queue. Use Add to queue to prepare a batch, Send now to send the current question, or Send all now to release the queued batch. Remove a queued item if you need to take it out. Sent questions appear in the response area.
Track and mark responses
- Switch to Track Responses to see live questions, participant count, response count and remaining time. Participants can submit multiple-choice, written or whiteboard responses, and use image markup/photos where offered. A timer may close a question and submit answers at expiry.
- Select a question to see the prompt, expected answer, responses and score summary. Use Extend time to add time or Stop & close to end it early. Multiple-choice answers are marked against the correct options as they arrive.
- Review each participant's answer and set their score/marks. Add optional feedback. For photo or drawing responses, wait for image transfer to finish, then open the image to zoom or annotate while marking. Written and visual answers need your review.
- After grading, choose the question's reveal-results action so each participant can see their answer, marks and feedback. Use the result cards to move between sent questions and inspect responses. Save a useful sent question to the Question Bank for later reuse.
Share results and review the class
- Hold results withholds correctness and marks until you reveal them.
- Leaderboard controls whether names and scores are shared with participants. It starts hidden in this room.
- The display menu provides text size, font and contrast options. A session-extension prompt may appear near the planned end time.
- Class Review pages through questions and shows the expected answer, correct/partially correct/incorrect totals and option breakdown.
- Select Present to Class to show the review, each participant's answer and score to the class. Select Stop Presenting to return participants to their session.
Finish the session
- Select End session when the class is finished. Review the confirmation showing how many students joined, then confirm to close the session for everyone. This cannot be undone; participants are told the session ended. Return to My Live Session for its dashboard and session summary.
- Confirm the title and duration.
- Prepare the questions and timers you plan to use.
- Decide whether to hold results and show the leaderboard.
- Have the room code or QR invitation ready.
- If a question fails to send or save, check the connection and its queue status before trying again.
Presenter dashboard
- My Live Session summarizes sessions run, responses, unique participants, attendance over recent sessions and recent topics.
- Scheduled sessions are listed so you can reopen or manage them. Return to the dashboard after the room ends to see session history and summary.
4. Participant (Student) guide
The sidebar includes My Progress, My Practice library, My Assignments and My Live Session.
4.1 Check your progress
My Progress is the dashboard for overall progress, submitted answers, marks, average score, subjects and graded subjects. Empty sections usually mean that no work has been assigned or completed yet.
4.2 Complete an assignment
In My Assignments, filter to All, Active or Completed, search by assignment name or topic, and sort by due date or recently added. Use Start for an open assignment and Results for submitted work. Expired assignments are disabled. The list also shows the due date, estimated time and description; page controls appear when the list is longer than one page.
- Open an active assignment and read its header, due date and description.
- Select a question in the numbered sidebar and wait for it to load in the main panel. Only one attempt is allowed per question; opening a question records an attempt.
- Answer within the question panel using the controls shown. Complete the question there; completed questions show a check and cannot be reopened from the sidebar.
- Choose Submit Assignment. The confirmation shows how many questions are complete. If some remain, return to the test to finish or submit the answers you have.
- After the success message, return to My Assignments. Open Results to review marks and feedback when your Presenter releases them.
Take care: Check every question before completing it. After a question is completed, it is locked and cannot be changed. Submitting with unfinished questions may leave them unanswered.
4.3 Practise independently
Open My Practice library. Choose an exam, board, subject, year, level, paper, section and question from the selectors, then select Load Assessment. The assessment questions appear below. If no questions appear, check your selections and load again. Available content depends on your account and library access.
4.4 Join a live session
- Get the current code from the Presenter.
- Open My Live Session and enter the code in Join a live session.
- Check the Joining as name and choose Join session.
- Answer questions as the Presenter shares them. Session count and progress appear in this area afterward.
Solve questions in a live session
Once you have joined the room, the Presenter sends questions to your screen. Stay on the live-session page while you work so your answers can save and your teacher can see your response.
- Wait for the question. Read its title and hint, inspect any image and note the timer. If the screen says the teacher's image is on its way, wait for it to appear before answering.
- Choose the response tool that fits. For a choice question, select an option (or more than one when allowed). For an image question, use the selection or drawing tools shown. For a whiteboard question, draw on the blank sheet. If text or photo answers are enabled, type your working, upload a picture, or use Take a photo with your phone and scan the QR code.
- Check your save status. The session bar shows Saving… and then Saved. If you lose your connection, keep the page open; your work is saved on the device and sends after reconnection. Photos may need to be attached again if the page reloads.
- Move between questions. Use Previous and Next question for questions in the current set. Open the question drawer to review the session history or jump to another available question.
- Submit your answer. On the last question, select Submit answer for one question or Submit all answers for a set. The submit control may remain disabled until you have entered an answer. If a timer is running, answers submit automatically when it reaches zero.
- Review the result. Your answer is locked after submission. When the Presenter reveals results, review the correct answer, marks and feedback. If results are held, wait for the Presenter to release them.
5. Settings, sign out and getting help
Select your name in the profile menu, then Settings. The settings page lists General, Account, Billing, Billing History, Referrals and Privacy.
General shows profile name, email, role and organisation. Privacy includes password and login-email updates, account-data download and an account-deletion request. Changing a login email requires current-password verification. Use Sign out from the profile menu when finished, especially on a shared device.
Quick fixes
- No assignment? Check the correct Participant account and clear filters. Ask the Presenter to confirm the assignment was sent to you.
- Group members cannot be edited? The group may be organisation-managed; contact its administrator.
- No questions in the assignment/session form? Save questions in the bank and check the right bank tab or tags.
- Cannot join? Verify the active session code with the Presenter.
- Need help? Select Need Help? Contact Support in the portal or email support@unidoodle.ie. Pip, the in-product assistant, is also available.
6. Role checklist
| Presenter | Participant |
|---|---|
| Create or select questions | Check assigned work and deadlines |
| Create assignment, choose participants and questions, then send | Open assignment, answer, review and submit |
| Review submissions and provide feedback | Check marks and feedback in My Progress |
| Start/save live sessions and share the code | Enter the code and join the class |